
Ah, the joy of your baby’s first bite of solid food. The tiny spoon, the wide eyes, the coos and gurgles between messy bites, and the profound sense of accomplishment for both of you.
But it’s not just about getting them to stop chewing on their own hand.
Oh no.
Your baby’s first tastes are a big deal, they’re about shaping their future health, development, and most importantly, their ability to eat without throwing food at you.
A controlled study published in Pediatrics (Mennella et al., 2001) found that infants whose mothers drank carrot juice during pregnancy or breastfeeding reacted more positively to carrot-flavored cereal during weaning.
They grimaced less, accepted more, and basically didn’t act like they were being poisoned. Turns out, flavor learning starts before the high chair ever enters the picture
The choices you make now can affect your baby’s relationship with food for life.
Talk about pressure. But don’t panic.
You don’t have to be a nutritionist or a celebrity chef to get it right. You just need the right info and lucky for you, this guide has it all.
It’s packed with tons of science-backed advice, insights from nutritionists, pediatricians, health experts, and parents, and real-world flavors for babies from around the globe.
It’s a fresh, no-fluff, unique point of view seasoned with experience and delivered with a touch of humor to keep you sane.
Why Flavor Exposure in Babies Matters
Time to bust a myth that’s been around since diapers were invented: Babies will just grow into good eating habits.
No, they won’t. Nope.
Babies develop preferences long before they can say yuck. From the very start, they’re building the foundation for a lifetime of eating habits.
And while they can’t yet hold a spoon, they’re forming strong opinions about what goes in their mouths.
According to a study published in Frontiers in Psychology, early exposure to different foods can significantly impact a child’s long-term food preferences and even reduce food neophobia.
Those first bites really do matter.
The Science Behind Flavor Exposure
Your baby is born with a preference for sweet flavors. Makes sense, right?
Sweet is a signal that food is energy-rich, which is great when you’re a pre-human trying to grow at lightning speed, as confirmed by a 2015 review in Physiology & Behavior.
This doesn’t mean your baby’s taste buds are set in stone.
Nope, not even close.
Flavor learning starts in the womb, as your baby gets its first taste of the amniotic fluid, which happens to be flavored by what you’re eating. So, if you’ve been craving pickles and ice cream, well, let’s hope they’re into it.
Earlier, I mentioned that babies exposed to certain flavors during pregnancy or breastfeeding were more open to those same tastes later.
And yes, actual research backs that up.

And as your baby grows, you’ll notice that by introducing a variety of tastes early on, you help prevent picky eating later.
It’s science, dear parents.
Give your baby a world of flavor now, or they’ll grow up only wanting chicken nuggets and fries.
Trust me.
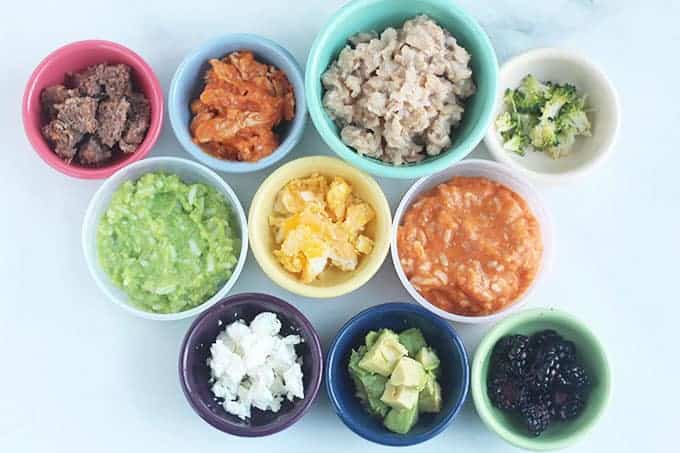
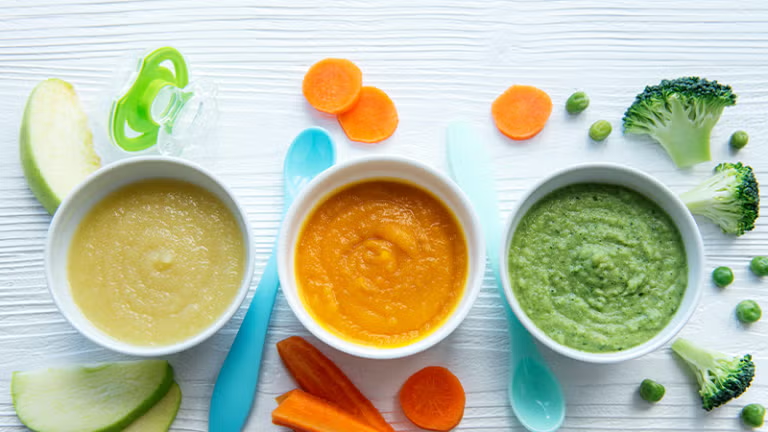
Stage-by-Stage: Best Baby Food Flavors
Expert insights from pediatricians, nutritionists, and parents
Now let’s break it down, stage by stage, because if there’s one thing babies are really good at, it’s changing their preferences every five seconds.
I’ve gathered insights from pediatricians, nutritionists, and parents to guide you through the process. With their expertise, you’ll know exactly what to expect and how to handle each stage.
Honestly, starting solids is really about finding a method that works for your family and is nutritionally sound. – Lily Nichols RDN/CDE
Read this before you lose your mind.
Smart Starts: Feed With Your Baby’s Growth
Feeding isn’t one-size-fits-all. It’s all about timing, patience, and wiping pureed carrots off the ceiling.
For the first 6 months, stick with breast milk or formula only. AAP, WHO, and ESPGHAN recommend exclusive breastfeeding during this time. Breast milk delivers the nutrients, antibodies, and enzymes your baby needs to grow and stay healthy.

At 6 months, start solids slowly. Breast milk or formula should still be your baby’s main source of nutrition.
Introduce one food at a time and watch how your baby responds. The goal is to help their digestive system adjust and reduce the chance of allergies.
After 12 months, solids take over as the primary source of nutrition. Keep offering variety to support growth and encourage better eating habits.
Next, let’s talk flavors, what works best at each stage.
Stage 1 (4–6 Months): Introducing Solids
Alright, your baby’s ready to graduate from sucking on thumb to actually eating something. At this stage, it’s all about simple, smooth, and safe foods that are easy to digest.
To encourage your little one to appreciate and accept natural flavours, do not add salt, sugar, and spice in preparing his food. – HealthHub Singapore
If your baby can sit up, lean forward, and open their mouth, they’re ready. These are the green lights to start solids.
Start with single-ingredient purees. Think iron-fortified cereal, mashed fruits, or mild veggies.
Iron matters now more than ever. Your baby’s growing fast, and iron helps fuel that development.
Keep it basic. Keep it soft.
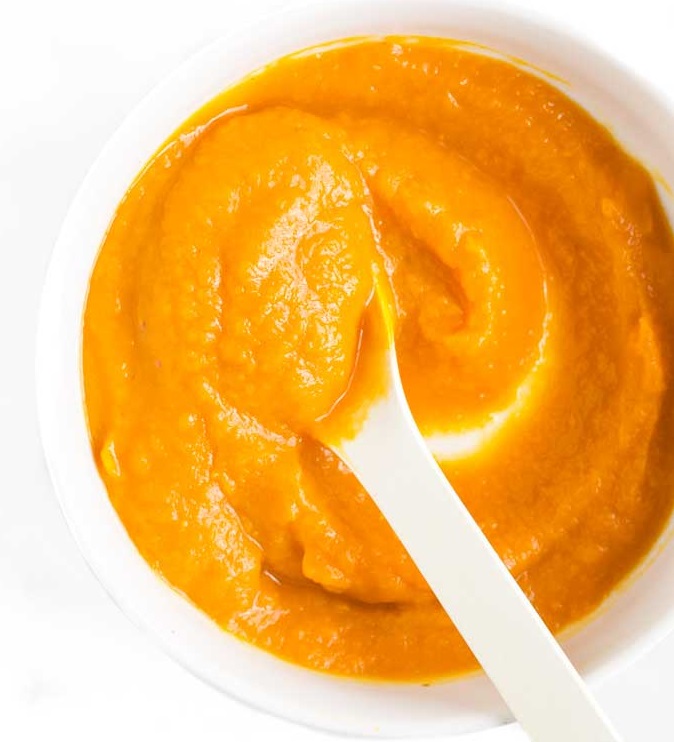
Sweet Potato
You’re a tough parent, and smashing a sweet potato is not that hard, right?
Lucky for you, it’s packed with beta-carotene, which supports vision and immunity. In fact, orange-fleshed sweet potatoes are a vitamin A powerhouse, fueling your baby’s growth, immune system, and even their developing eyes.
Your baby will love it and if they don’t, just wait, they’ll be back for more. The natural sweetness is a crowd-pleaser.
Sweet Potato Puree Recipe
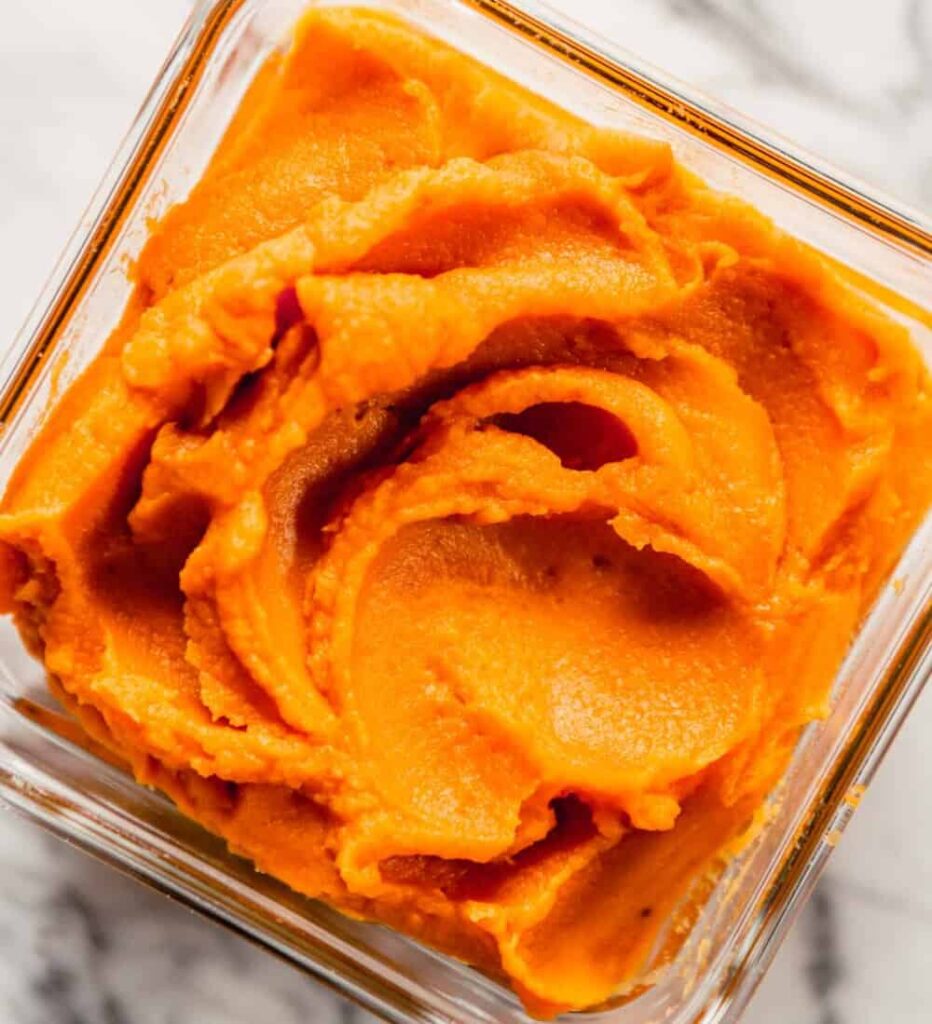
Age: 6+ months
Texture: Smooth and runny (adjust with breast milk, formula, or water)
Ingredients:
- 1 medium sweet potato
- Water, breast milk, or formula (as needed)
Instructions:
- Wash and peel the sweet potato.
- Cut it into small chunks.
- Steam or boil the chunks until tender, about 10–15 minutes.
- Let it cool slightly, then transfer to a blender or food processor.
- Blend until smooth. Add water, breast milk, or formula to reach a thin consistency suitable for beginners.
How to Serve:
- Serve warm or at room temperature.
- Start with 1–2 teaspoons.
- Gradually increase the amount as your baby gets used to solids.
Storage Tips:
- Refrigerate in an airtight container for up to 3 days.
- Freeze in ice cube trays or small containers for up to 1 month.
Pear:
Gentle on the stomach and low in acidity, Pear is an easy and simple choice for tiny tummies. It’s great for your baby’s digestive system because it is packed with fiber to keep things moving (you know what I mean).
In fact, a 2015 review in Nutrition Today highlights pears as a gut-friendly fruit, rich in both soluble and insoluble fiber, making them ideal for promoting healthy digestion even in sensitive systems.
It has a dose of vitamin C for immune support and potassium for healthy growth. It’s sweet and familiar, so no surprises here unless they decide to spit it out (but you know the drill, right?).
Pear Puree Recipe
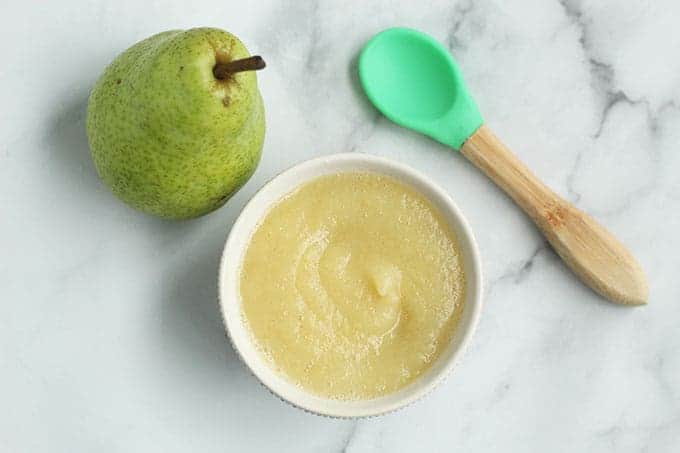
Age: 6+ months
Texture: Smooth and thin (adjust with water, breast milk, or formula)
Ingredients:
- 1 ripe pear (Bartlett, Anjou, or Bosc work well)
- Water, breast milk, or formula (as needed)
Instructions:
- Wash, peel, and core the pear.
- Cut it into small chunks.
- Steam the pear pieces for 5–8 minutes until soft.
(If very ripe, steaming may not be necessary, just blend raw.) - Let it cool slightly.
- Blend until smooth. Add water, breast milk, or formula to adjust the texture.
How to Serve:
- Serve at room temperature or slightly warm.
- Start with 1–2 teaspoons.
- Gradually increase as your baby adjusts to solids.
Storage Tips:
- Refrigerate in an airtight container for up to 3 days.
- Freeze in ice cube trays or small containers for up to 1 month.
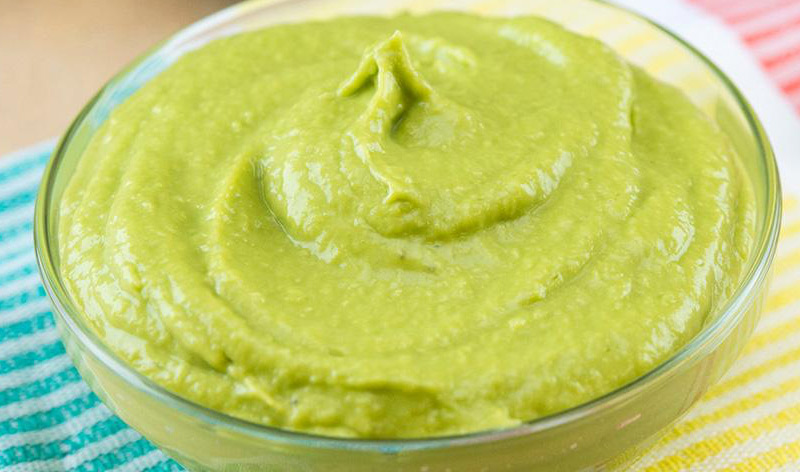
Avocado
Oh yes, the avocado. The superfood. The creamy, fatty dream food that your baby will either love or throw on the floor. oOops.
It’s packed with healthy fats for brain development. These fats are monounsaturated and support everything from nerve function to eye health.
Avocados are also full of essential vitamins and minerals like potassium, vitamin K, and folate, which support growth, immunity, and even bone strength.
Avocados are not only loaded with vitamins and minerals but are another great ‘solid’ option that your baby can smash between their gums. – Wake Forest Pediatrics
It’s naturally bland, which makes it the perfect intro to solids.
Note: While avocado is an excellent first food, as with any new food, it’s important to watch for rare allergic reactions, especially in children with latex allergies
Avocado Puree Recipe
Age: 6+ months
Texture: Smooth and creamy (can be thinned with liquid)
Ingredients:
- 1 ripe avocado
- Water, breast milk, or formula (as needed)
Instructions:
- Cut the avocado in half and remove the pit.
- Scoop out the flesh with a spoon.
- Mash it with a fork until smooth.
(For extra smooth texture, blend it.) - Add water, breast milk, or formula to adjust the consistency, especially for early eaters.
How to Serve:
- Serve fresh, at room temperature.
- Start with 1–2 teaspoons.
- Offer more gradually based on your baby’s interest.
Storage Tips:
- Best served fresh.
- Can be stored in the fridge for up to 1 day.
- Not ideal for freezing due to texture change.
Stage 2 (7–9 Months): Expanding Flavors and Gentle Spice
Your baby’s palate is developing, and it’s the right time to move past bland purees. Start thickening textures, mash or finely chop cooked vegetables, fruits, and soft meats.
This helps them learn to chew, even though they’re still using their gums.
Stage 2 baby foods have a thicker texture than stage 1 and often combine multiple ingredients, including fruits, vegetables, meats, legumes, grains, and even herbs and spices. This variety helps build a baby’s palate and oral skills. – Nicole Lattanzio, , RDN, CSP, IBCLC
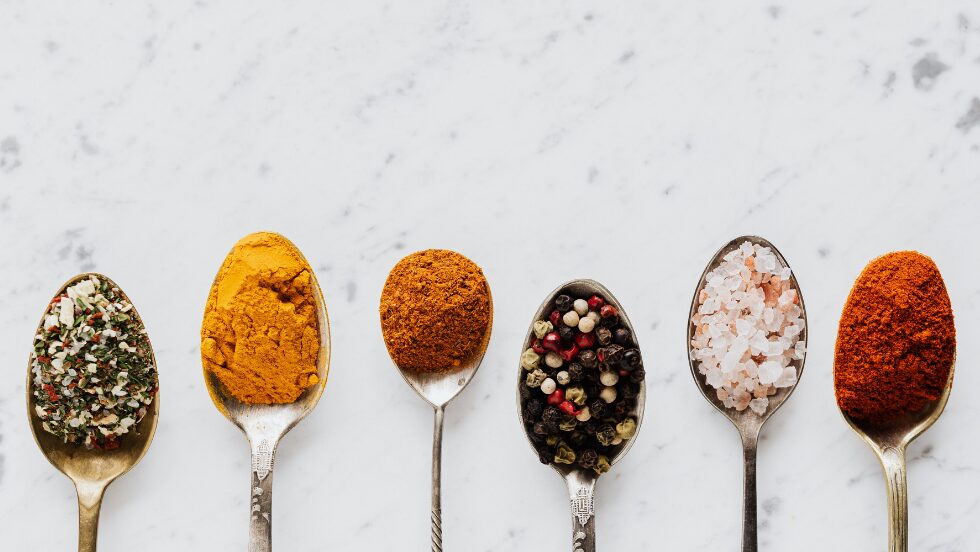
They’re also ready for mild flavor combinations. Add gentle spices like cinnamon, cumin, or garlic to introduce variety without overwhelming their system.
You’re helping them build chewing skills and taste recognition at the same time.
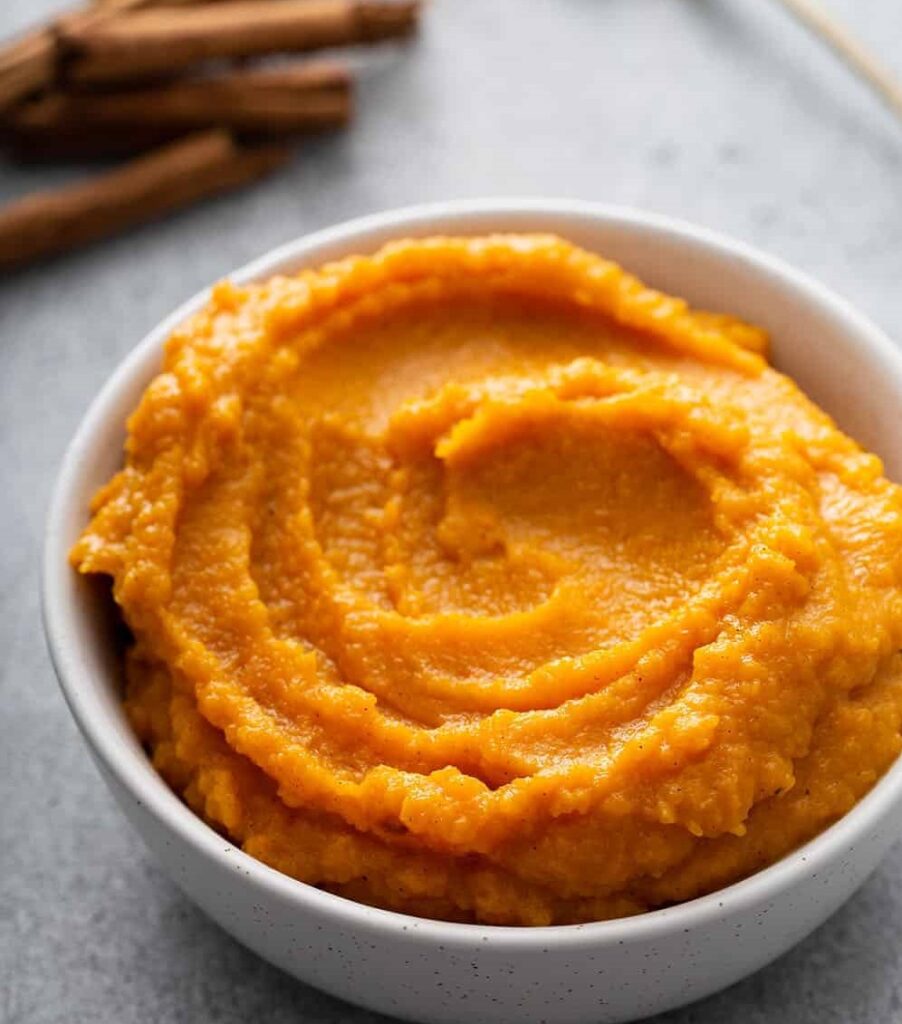
Butternut Squash + Cinnamon
This one’s a classic. Butternut squash is naturally sweet and loaded with vitamins A and C, key for eye health and boosting your baby’s immune system.
And cinnamon? Well, it’s warm, spicy, and slightly sweet, bringing not just flavor but antioxidant and anti-inflammatory benefits that support immune health.
God! The smell is great.
Just don’t go overboard with the cinnamon; a pinch goes a long way.
Remember, it’s all about balance. This combo is great for digestion, growth, and encouraging a love of healthy flavors.
Butternut Squash + Cinnamon Recipe
Ingredients:
- 1 small butternut squash (peeled, seeded, and chopped)
- ¼ tsp ground cinnamon
- Water or breastmilk/formula (as needed for consistency)
Instructions:
- Steam or boil the squash until it’s soft (about 10–15 minutes). You should be able to mash it easily with a fork.
- Mash or blend the cooked squash. You can mash it roughly for a thicker texture or blend it smoother, depending on your baby’s comfort level.
- Stir in cinnamon while it’s still warm. Start with ¼ tsp. You can adjust the next time based on how your baby reacts.
- Thin it out with a bit of water, breastmilk, or formula if needed.
- Let it cool to a safe temperature before serving.
Storage Tips:
- Keeps in the fridge for up to 3 days.
- Freeze in small portions (ice cube trays work great) for up to 1 month.
Apple + Blueberry + Beet
Sweet, fruity, and full of antioxidants.
What’s not to love? I don’t have to be a baby to starve for it.
Blueberries give it that antioxidant punch, helping protect cells and support brain development. Beets are the underdog of the vegetable world, packed with betalains that promote healthy cell growth and immune function.
Betalains demonstrate a variety of health-promoting biological activities, most notably as powerful antioxidants. Betalains scavenge free radicals (a.k.a. reactive oxygen species) and can inhibit lipid peroxidation and LDL cholesterol oxidation. – Dr. Sarah Ballantyne, PhD
This combo doesn’t just taste great, it’s also packed with fiber, vitamins, and minerals to boost digestion, support immune health, and encourage healthy growth.
Your baby will be stronger, smarter, and possibly pinker after eating this.
Apple + Blueberry + Beet Recipe

Ingredients:
- 1 medium apple (peeled, cored, chopped)
- ½ cup blueberries (fresh or frozen)
- ½ small beet (peeled, chopped)
- Water, breastmilk, or formula (as needed)
Instructions:
- Steam the beet pieces first for about 10–15 minutes, until soft. Beets take longer than apples and blueberries.
- Add apple and blueberries to the steamer. Cook everything together for another 5–7 minutes, until all are tender.
- Transfer to a blender or food processor. Blend until smooth or slightly textured, depending on what your baby can handle.
- Add liquid if needed to thin out the puree. Use water, breastmilk, or formula to get the consistency right.
- Cool it down before serving.
Storage:
- Fridge: 3 days
- Freezer: Up to 1 month (use ice cube trays or baby food containers)
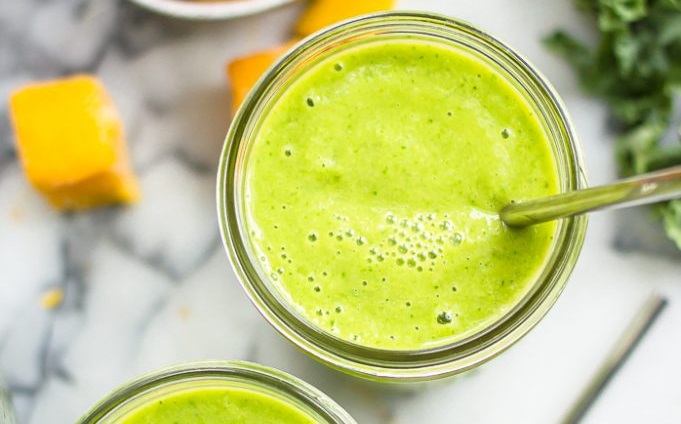
Mango + Kale
That’s right, mango and kale, a healthy chaos in a cup.
Mango’s sweetness balances out the bitter kale, and together, they’re a nutritional powerhouse. Mango is packed with vitamin C and antioxidants, supporting your baby’s immune function, skin health, and overall growth.
Kale, on the other hand, is a nutrient-dense leafy green, loaded with vitamins A, C, and K, and minerals like calcium and potassium that support eye health, bone development, and blood clotting.
The vitamin C from mango helps your baby absorb the iron in kale, making it a double whammy of nutrients.
Don’t be surprised if your baby starts asking for kale chips when they turn three.
Mango + Kale Recipe
Ingredients:
- 1 ripe mango (peeled, pitted, chopped)
- ½ cup kale leaves (stems removed, chopped)
- Water, breastmilk, or formula (as needed)
Instructions:
- Steam the kale for about 3–4 minutes until soft. This helps remove any bitterness and makes it easier to digest.
- Add chopped mango to the blender with the steamed kale.
- Blend until smooth or leave a bit of texture depending on your baby’s stage.
- Add liquid as needed to get the right consistency.
- Cool and serve. (Mango can get hot when blending, so test the temperature before offering.)
Storage:
- Fridge: 2–3 days
- Freezer: Up to 1 month
Stage 3 (10–12 Months): Texture, Protein, and Umami
Now, the big leagues.
By this point, your baby’s basically a trainee food critic, opinionated and very into texture.
They’re ready for finger foods like soft-cooked pasta, ripe banana, teething biscuits, and well-cooked chicken, cut into small, safe pieces to avoid choking.
Your baby should now be enjoying a wide variety of foods and textures, and may find it easier to pick up food and feed themselves. It’s important to include a range of food groups, without added salt or sugar. NHS
This is also when you can introduce more protein and savory, umami flavors. Think gently seasoned lentils, shredded meats, or soft tofu.
Start bringing them into more family-style meals too, just keep the salt low. Your baby will love being part of the table action and expect a few noodles to go airborne.
Lentil + Turmeric + Coconut Milk
Lentils bring the protein punch and iron boost babies need for growth and brain development. They’re also loaded with fiber to keep digestion smooth.
Turmeric is your super spice, packed with antioxidants and anti-inflammatory power to support your little one’s budding immune system.
Coconut milk is rich in healthy fats and essential minerals, giving the dish a creamy, dreamy finish. This combo is nourishing yet delicious.
Lentil + Turmeric + Coconut Milk Recipe
Ingredients:
- ¼ cup red lentils (rinsed well)
- 1 small carrot (peeled, chopped)
- ⅛ tsp turmeric powder
- 2 tbsp full-fat coconut milk (unsweetened)
- 1 tsp olive oil or ghee
- 1 cup water or low-sodium vegetable broth
- Pinch of cumin seeds (optional)
- A few grains of salt (optional – check with your pediatrician)
Instructions:
- Heat oil in a small pot. Add cumin seeds (if using) and turmeric. Stir for a few seconds.
- Add lentils, carrot, and water or broth. Bring to a boil.
- Lower the heat and simmer for 15–20 minutes until the lentils and carrots are very soft.
- Stir in coconut milk.
- Mash with a fork or blend briefly for a soft, textured consistency.
- Let cool before serving. Always check the temperature before feeding.
Storage:
- Fridge: 2–3 days
Freezer: Up to 1 month (store in baby-safe portions)
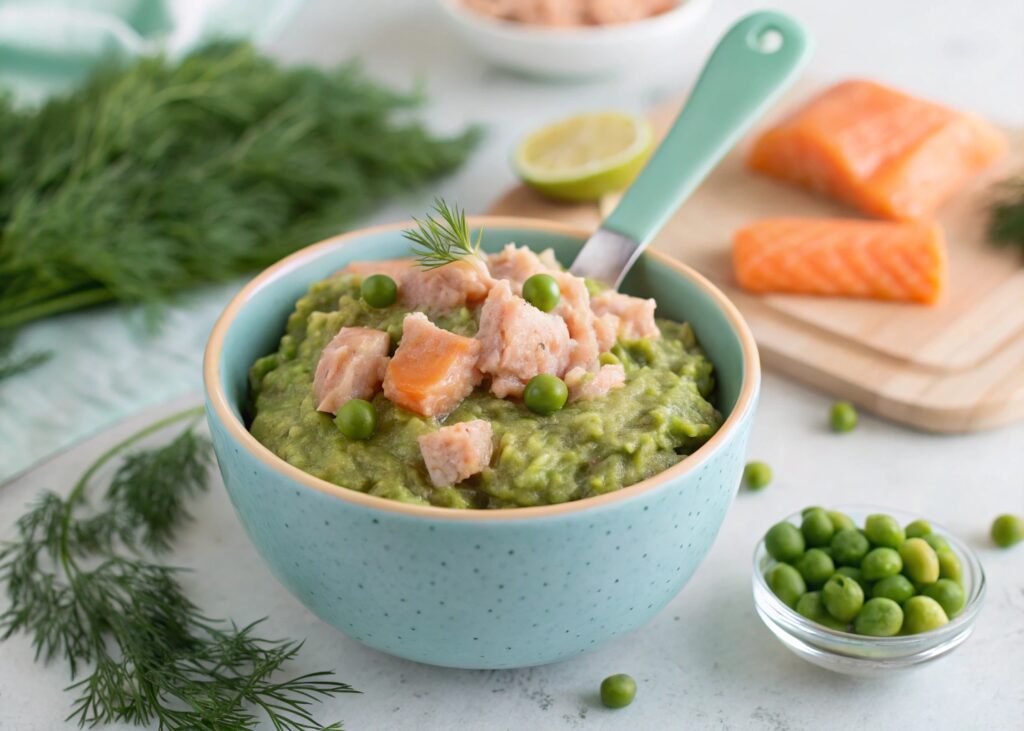
Salmon + Dill + Pea:
This trio is a brain-boosting, immune-supporting, digestion-friendly blend. Packed with DHA and EPA, salmon helps boost brain power, sharpen vision and prep your little one arguing over bedtime.
It’s also loaded with protein, vitamin D, and B vitamins to keep growth on track and the immune system running like it should.
Many American babies and toddlers do not consume a sufficient amount of omega-3s, partly because the standard American diet is lacking in omega-3 fatty acids relative to omega-6 fatty acids, and current omega-3 recommendations are too low to provide a physiologically meaningful dose. – Gina Jaeger, PhD
Dill and peas add flavor, fiber, and a little green to balance the pink. Peas add a natural touch of sweetness, fiber to keep digestion running smoothly, and plant-based protein for energy and development.
Dill cuts the fishy flavor with a fresh lift and may even support digestion with its antimicrobial properties.
Together, they create a nutrient-rich combo that introduces savory flavors while nourishing your baby’s body and brain.
One tiny bite at a time.
Salmon + Dill + Pea Recipe
Ingredients:
- 1 small salmon fillet (boneless, skin removed)
- ½ cup peas (fresh or frozen)
- 1 tsp fresh dill (finely chopped) or a pinch of dried dill
- 1–2 tsp olive oil or unsalted butter (optional)
- Water or low-sodium vegetable broth (as needed)
Instructions:
- Cook the salmon
Steam, bake, or pan-cook the salmon until fully cooked (about 10–12 minutes). Flake it with a fork and double-check for bones. - Cook the peas
Steam or boil peas until soft (about 5–7 minutes). If using frozen, rinse before cooking. - Mix it all together
In a bowl, combine the flaked salmon and peas. Add the dill and a bit of olive oil or butter if using. - Mash or chop
Use a fork to mash it lightly or give it a few pulses in a food processor. Keep it chunky but manageable. Your baby should be practicing chewing at this stage. - Cool and serve
Let it cool to a safe temperature before serving.
Storage:
- Fridge: Up to 2 days
- Freezer: Not ideal due to fish texture, but can freeze in small portions for up to 1 week if needed.
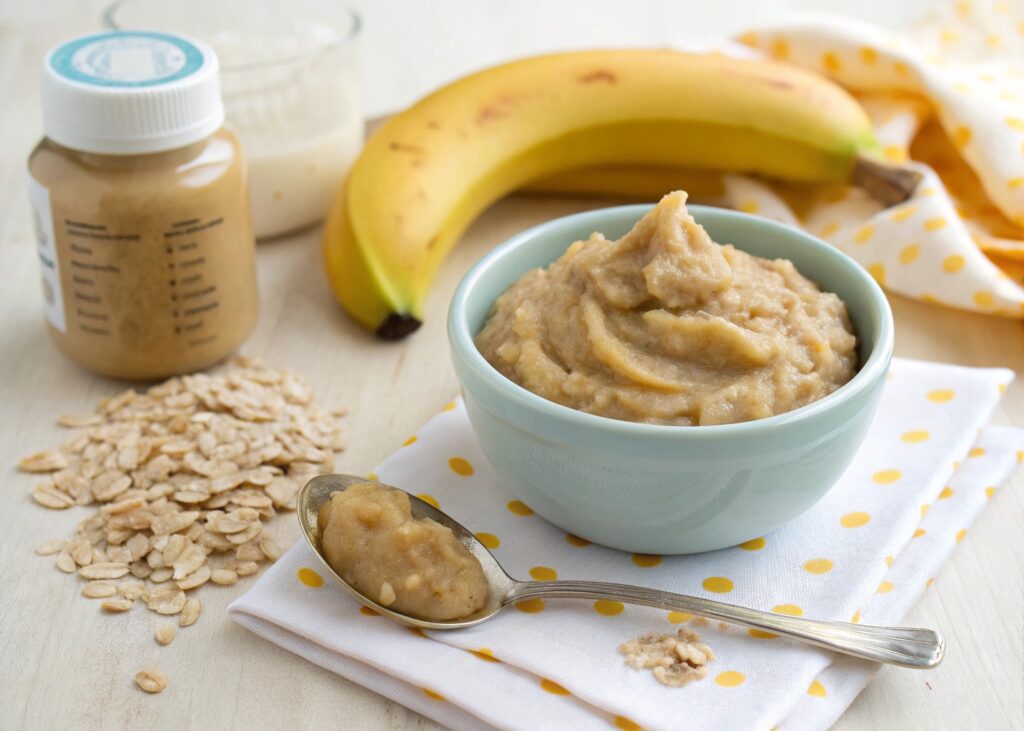
Peanut Butter
Introducing peanuts early can reduce the risk of peanut allergies by up to 86%, according to research supported by the University Hospital Southampton NHS Foundation Trust.
Early and continuous exposure helps train the immune system to treat peanuts as food, not a threat. Mix it with banana or pear, and boom, you’ve got a delicious, nutrient-packed meal.
Over several decades, the deliberate avoidance of peanuts has understandably led to parental fear of early introduction. – Prof. Graham Roberts, NIHR
And it’s not just allergy protection, peanut butter is a great source of plant-based protein, iron, zinc, and brain-boosting fats like long-chain polyunsaturated fatty acids. It even contains arginine, an amino acid that supports healthy growth.
You’re also setting the stage for long-term healthy habits. Pairing Peanut Butter with veggies can help boost your baby’s veggie intake, too.
Just remember, whole or chopped peanuts are a no-go for kids under five. Stick to smooth or thinned peanut butter for babies who are ready for solids.
Peanut Butter + Banana + Oats Mash Recipe
Ingredients:
- 1 ripe banana
- 1 tbsp natural peanut butter (smooth, unsweetened, unsalted)
- 2 tbsp quick oats or cooked rolled oats
- Breastmilk, formula, or water (as needed)
Instructions:
Mash the banana
- Use a bowl and mash until smooth (a little texture is fine)
Add peanut butter
- Mix well with the mashed banana
Stir in oats
- Quick oats: Add directly, and they’ll soften in the banana
- Cooked rolled oats: Make sure they’re soft and cooled before mixing in
Adjust texture
- If too thick, add a splash of breastmilk, formula, or water
Serve right away
- It should be soft and scoopable
- Baby can eat it with a spoon or fingers
Storage:
- Fridge: Up to 1 day (banana browns fast)
- Freezer: Not recommended
How to introduce global baby food Flavors
Feeding your baby is about giving them a head start on loving good food and saving yourself from a lifetime of battles over “just one more bite.”
Honestly, introducing a variety of flavors early is kind of genius.
Babies are biologically primed to accept all sorts of tastes, sweet, sour, bitter, even naturally salty and they actually start learning flavors through amniotic fluid and breastmilk.
By 10-11 months of age, all babies should be getting age-appropriate finger foods and complex textures… including a wide variety of flavors to reduce food fussiness later in childhood.” – Lily Nichols, RDN, CDE
Babies who taste a wide mix of spices and textures grow up thinking food is exciting, not just some bland mush on a plate. They start to see the world as this huge, colorful place, not just peas and applesauce.
Different cuisines sneak in way better nutrition without you having to get all sneaky.
One day it’s lentils packed with protein and gentle spices like turmeric or cumin, the next it’s buttery avocado fats or herbed veggie purees.
Way better than hiding the spinach in a smoothie and praying your baby likes it.
Start now!
Seriously, now, and you’ll help your child grow up open to all kinds of flavors, maybe even broccoli and kimchi.
No bribes, no tears.
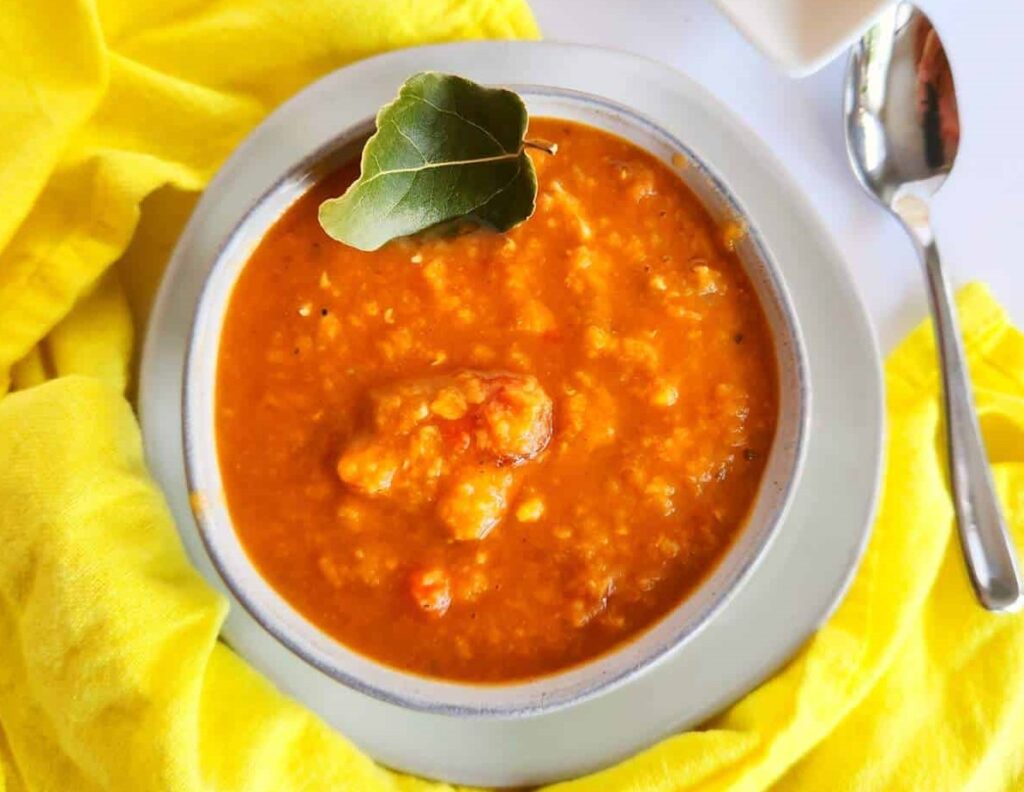
Moroccan Carrot + Lentil Purée (6 Months Plus)
Sweet, spiced, and packed with nutrition, this baby meal of carrots, lentils, cinnamon, and a pinch of cumin does more than just fill a belly.
Carrots deliver beta-carotene, which supports eye health and strengthens immunity. Of course, peek-a-boo skills need sharp vision.
Lentils add plant-based protein, iron, and fiber, helping your baby’s muscles grow and digestion stay on track.
Cumin and cinnamon, introduced in small amounts from six months, offer antioxidants and promote gut health.
So you’re not just serving lunch, you’re training a future foodie.
Start small.
One spoonful today, two tomorrow.
Recipe
Ingredients:
- 1 cup carrots, peeled and chopped
- ¼ cup red lentils, rinsed well
- 1 ½ cups water or sodium-free veggie broth
- ⅛ tsp ground cumin
- ⅛ tsp ground cinnamon
- 1 tsp olive oil (optional, for healthy fat)
Instructions:
- Prep & Simmer:
Add carrots, lentils, and water/broth to a small pot. Bring to a boil, then reduce to a simmer. Cook for 15–20 minutes, until carrots are soft and lentils are fully cooked. - Spice it gently:
Stir in cumin and cinnamon during the last 2–3 minutes of cooking. This keeps the flavor gentle but present. - Blend:
Let it cool slightly, then blend until smooth. Add a splash of water, breast milk, or formula to adjust the texture if needed. - Finish with healthy fat (optional):
Stir in olive oil before serving to boost nutrition and improve absorption of fat-soluble vitamins.
Thai Coconut Pumpkin Purée (6 Months Plus)
This creamy mix of pumpkin and coconut delivers a smooth texture and easy-to-digest nutrition. Pumpkin offers essential vitamins A and C, helping to strengthen your baby’s vision and immune system.
Coconut contributes healthy fats known as MCTs, providing quick energy and supporting brain development, perfect for your little one (or at least for my hyperactive little toad).
A sprinkle of mild spices gently opens the door to new tastes without overwhelming your baby.
Begin with a few mashed spoonfuls alongside breast milk or formula.
A study published in the JPNIM highlighted how fats like MCTs are quickly absorbed and provide essential energy for a baby’s rapidly growing brain, especially during those critical first 1,000 days of life.
Recipe
Ingredients:
- 1 cup pumpkin (peeled and chopped)
- ½ cup coconut milk (unsweetened, full-fat)
- 1 small carrot, peeled and chopped
- 1 small potato (optional for creaminess), peeled and chopped
- ¼ tsp mild curry powder or turmeric (optional, start small)
- 1 tsp olive oil (optional, for healthy fat)
- 1 ½ cups water or low-sodium vegetable broth
Instructions:
- Cook the Veggies:
In a pot, add the pumpkin, carrot, and potato (if using). Pour in the water or broth and bring to a boil. Reduce the heat to a simmer and cook for about 15–20 minutes, or until the vegetables are soft and tender. - Add Coconut Milk & Spice:
Add the coconut milk and a pinch of mild curry powder or turmeric (if using). Stir to combine and let it simmer for another 2–3 minutes. - Purée:
Let the mixture cool slightly, then blend everything together until smooth. Add more water or breast milk/formula to reach your desired consistency. - Finish with Healthy Fat (Optional):
If desired, stir in a teaspoon of olive oil for added nutrition.
Storage:
Refrigerate in an airtight container for up to 3 days, or freeze in small portions for up to 1 month.
Creamy Kabocha Squash Puree
Naturally sweet and rich in nutrients, kabocha squash makes an excellent first vegetable for your baby.
It’s high in beta-carotene, which supports eye health and protects delicate skin, because glowing skin isn’t just for Instagram.
It also delivers fiber that encourages the growth of healthy gut bacteria. Steam the squash lightly to preserve its nutrients, then puree until smooth for easier acceptance and less suspicious looks.
Research from Forestell & Mennella (2007) suggests that offering vegetables early can significantly lower the risk of picky eating later.
Have you tried steaming instead of boiling to lock in more nutrients?
Recipe

Ingredients:
- 1 small Japanese Kabocha squash (about 2–3 lbs)
- Filtered water or breastmilk/formula (as needed)
Optional (for babies 8+ months):
- A pinch of cinnamon
- A tiny knob of unsalted butter or a drizzle of olive oil
Instructions:
Prep the squash
- Cut it in half
- Scoop out seeds and stringy parts
- Leave the skin on (it softens when cooked) or peel for a smoother texture
Cook it
- To steam: Cut into chunks and steam for 15–20 minutes until soft
- To roast: Place cut-side down on a baking tray, roast at 375°F (190°C) for 30–40 minutes
Cool and blend
- Let it cool a bit
- Scoop out the soft flesh
- Blend with water, breastmilk, or formula to get the right texture (start with a few tablespoons)
Optional add-ons (for babies 8+ months)
- A pinch of cinnamon or a tiny bit of butter for extra flavor and healthy fats
Serve or store
- Serve warm or at room temp
- Freeze in small portions (ice cube trays work well)
Storage:
Refrigerate in an airtight container for up to 3 days, or freeze in small portions (ice cube trays work well) for up to 1 month.
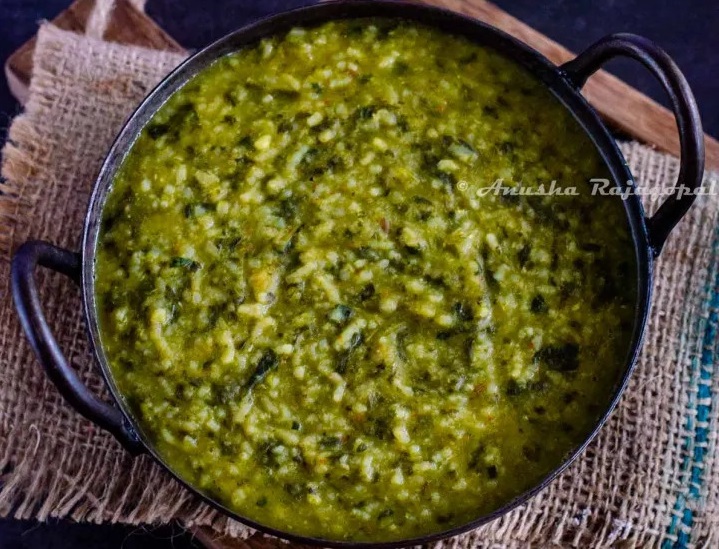
Indian Spinach + Rice (Palak Khichdi)
Not gonna lie, I make a batch for the baby and somehow half of it ends up on my plate. Together, spinach and rice offer a comforting, balanced meal made for your growing baby.
Spinach delivers iron to support healthy blood production and vitamin K to help build strong bones, essential for crawling, climbing, and bouncing off the cushions.
Spinach is a nutrient-rich leafy green that can be introduced to babies around 6 months of age. It provides essential vitamins and minerals, including vitamin K, vitamin A, vitamin C, iron, and folate, which support bone health, immune function, and overall growth. – MJ, RDN
Rice offers simple, easy-to-digest carbohydrates that provide steady energy for a tiny toddler hurricane.
Cooking spinach lightly helps preserve its vitamin C content, and blending it with rice results in a creamy, nutrient-dense mash. Add a few lentils to complete the protein profile naturally.
According to the American Academy of Pediatrics (AAP), iron needs increase sharply after six months; this dish helps meet those critical demands.
Are you making sure your baby’s diet supports enough iron intake?
Little Popeye would be proud.
Recipe
Ingredients:
- 2 tablespoons white rice (washed and soaked for 10–15 minutes)
- 1 tablespoon yellow split lentils (moong dal – optional but great for added protein)
- 1 cup fresh spinach leaves (washed and chopped)
- 1½ cups water
- ½ teaspoon ghee (clarified butter – optional)
- A tiny pinch of ground turmeric or cumin seeds (optional for babies 8+ months)
Instructions:
Combine ingredients
In a small pot or pressure cooker, add:
- Rice
- Lentils (optional)
- Spinach
- Water
Cook until soft
- Pressure cooker: Cook for 2–3 whistles
- Stovetop: Simmer for 25–30 minutes
Cool and mash
- Let it cool down a bit
- Mash with a spoon or blend for a smooth texture (based on your baby’s age)
Add healthy fat (optional)
- Stir in a little ghee for taste and nutrition
Serve warm
- Check the temperature before feeding
Storage:
Refrigerate in an airtight container for up to 2 days, or freeze in small portions for up to 1 month.
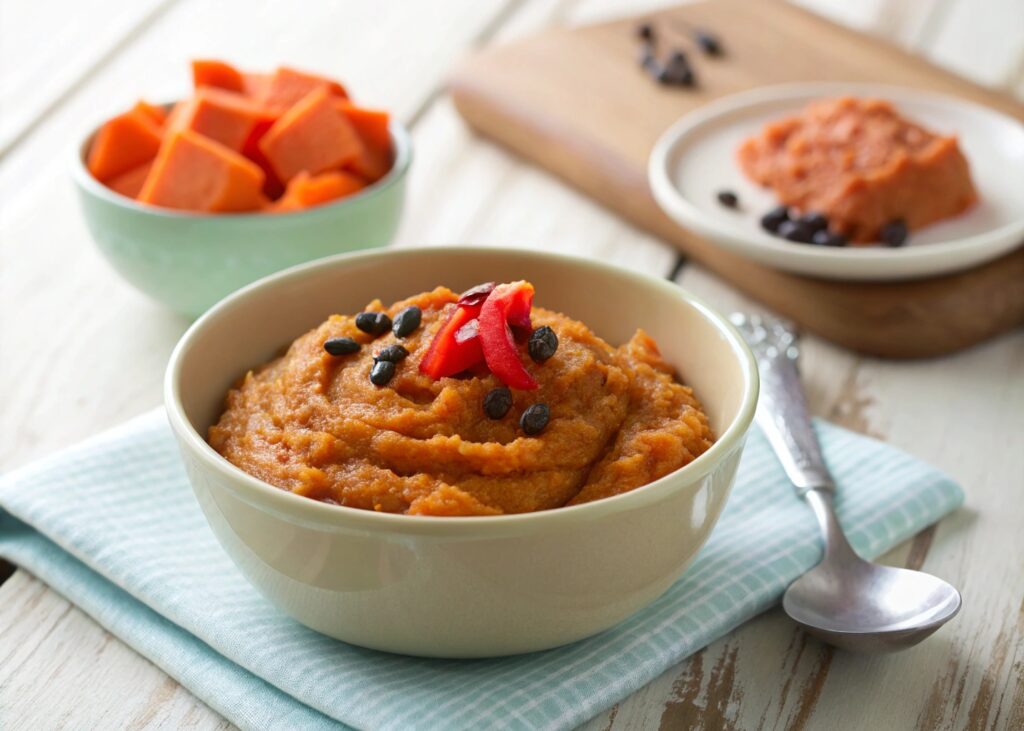
Mexican Sweet Potato + Black Bean
Why not introduce your baby to vibrant nutrition with a delicious dish of sweet potatoes and black beans?
Sweet potatoes deliver beta-carotene for sharp eyes, fiber for smooth digestion, and potassium for a happy heart.
Black beans bring plant-based protein, folate, and iron to support growth and muscle development; imagine your kiddo with tiny biceps…Ah, never mind.
Mash the ingredients together until smooth, and add just a tiny sprinkle of cumin for an extra pop of flavor.
Is taco night on your baby’s calendar yet? If not, it should be.
Recipe
Ingredients:
- 1 medium sweet potato, peeled and diced
- 1/4 cup black beans (cooked, no salt; canned is fine, rinse well)
- 1 tbsp finely chopped red bell pepper (optional, for flavor and color)
- 1/2 tsp ground cumin (optional, adds warmth without heat)
- 1 tsp olive oil or avocado oil
- 1–2 tbsp breast milk, formula, or water (for texture)
Instructions:
- Steam or boil the sweet potato until very soft (about 10–12 minutes).
- In a pan, warm the olive oil and lightly sauté the bell pepper for 2–3 minutes (skip this if you’re keeping it super mild).
- Add sweet potato, black beans, and cumin (if using) to the pan. Cook together for 1–2 minutes to blend flavors.
- Mash everything together with a fork or potato masher. For younger babies, blend with breast milk/formula until smooth.
- Let it cool to a safe temperature and serve.
Storage:
Refrigerate in an airtight container for up to 2 days, or freeze in small portions for up to 1 month.
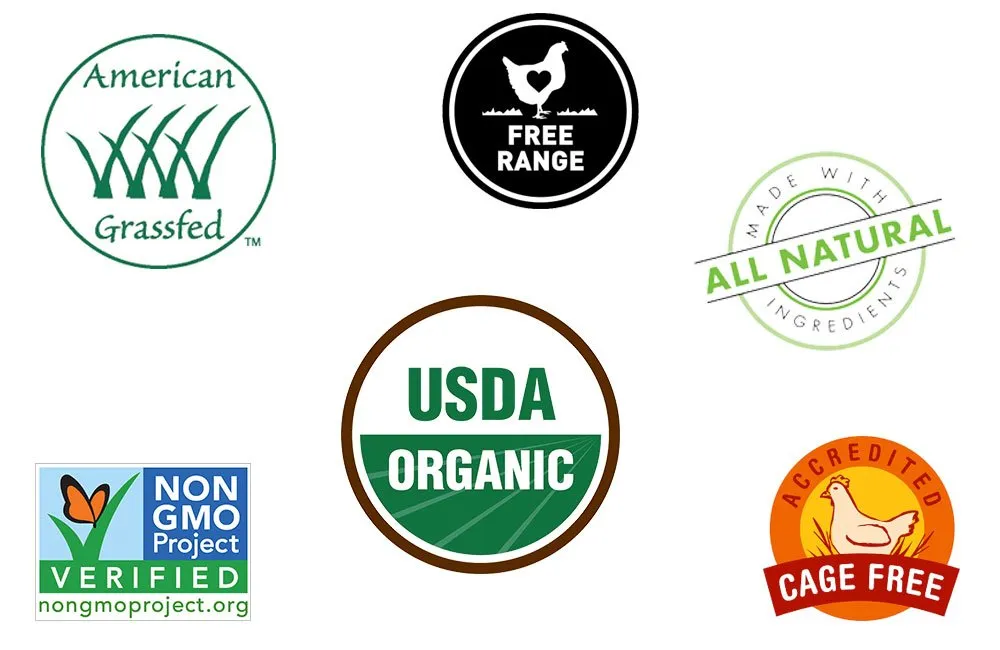
Organic and Clean-Label Foods: The Parents’ Choice
Parents today are making sharper choices. They want food that’s simple, honest, and clean.
The organic baby food market isn’t just growing, it’s exploding. Organic baby food made $6.3 billion in 2023 and could hit $20.6 billion by 2033.

The biggest reasons?
Pesticides, GMOs, and preservatives.
Organic foods cut out synthetic pesticides and must meet USDA standards, with 95% certified organic ingredients. Sounds great, right?
But remember, organic doesn’t automatically mean healthier. A lab analysis of 20 commercial baby food products found that 7 of them got more than half their calories from sugar.
One of the worst offenders?
Gerber’s First Foods Select Apples, 87.6% of its calories came from sugar (Walker & Goran, 2015, p. 5853).
Organic labels can also include up to 5% non-organic ingredients, especially to allow for fortification.
Cost matters too.
Don’t panic. Things are probably better today than they were 20 years ago or 40 years ago. Today, we just know a lot more about brain development and food safety, and are rightfully demanding more stringent regulation on baby food manufacturers. – Jill Castle, Pediatric RDN
Buying 100 percent organic isn’t realistic for every family unless you’re feeding a trust fund baby.
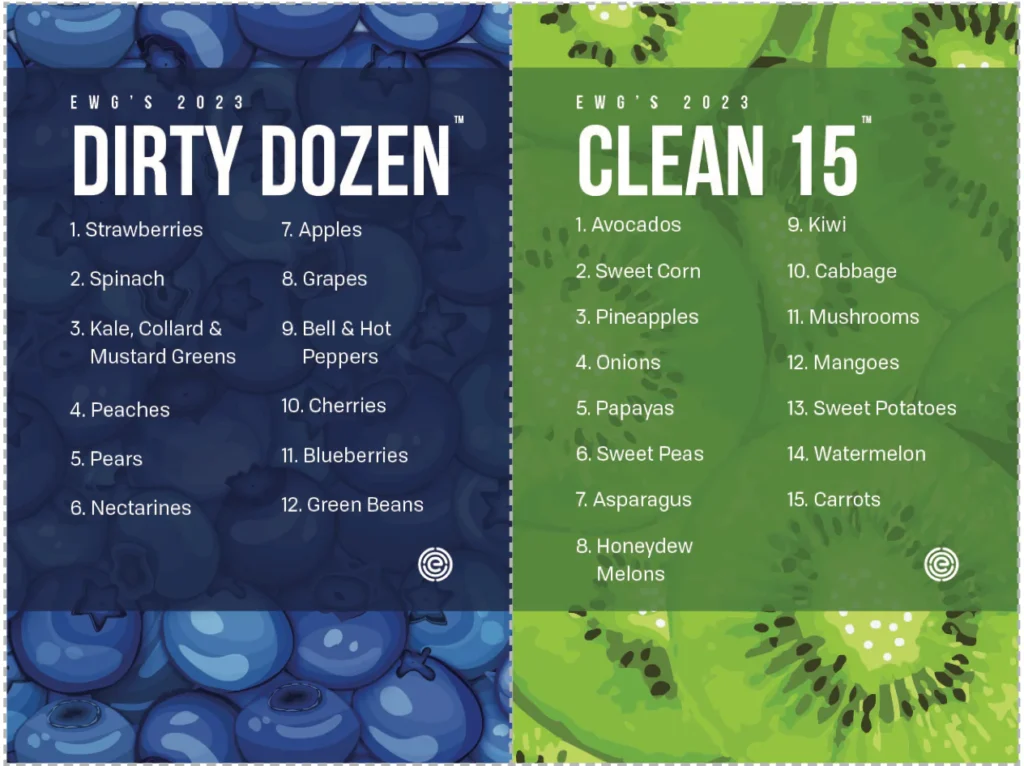
A practical tip is to go organic for produce with high pesticide risk, like the Dirty Dozen list, which includes apples, strawberries, and spinach.
Save money by choosing conventional for the Clean Fifteen, like avocados, sweet corn, and pineapple.
The bottom line is to focus on whole foods first. Pick low-sugar, minimal-ingredient options. Use organic smartly based on your budget and the food’s pesticide risk.
No mystery ingredients. No second-guessing. Just real food you feel good about feeding your baby (and occasionally stealing a bite of).
Hidden Risks: Metals and Allergens in Baby Food Explained
Organic baby food flavors without heavy metals
You might wonder if your baby’s food could contain harmful substances like heavy metals.
Good news!
Top brands are taking safety seriously. They’ve got strict screening in place for things like lead and arsenic, the kind of ingredients that don’t belong in baby food, or anywhere outside a chemistry lab.
How Heavy Metals Sneak Into Baby Food
Heavy metals like arsenic, lead, cadmium, and mercury can sneak into baby food through soil, water, or ingredients.
These metals have been linked to developmental risks, with arsenic and lead even known to impact cognitive growth.
Parents are now panicking… exposure to heavy metals in childhood is linked to permanent dips in IQ, an increased risk of future criminal activity, and damaged long-term brain function. – Nicole Silber, RD
And did you know rice is a major source of arsenic?
In fact, it often contains 10 times more inorganic arsenic than other grains. That’s why the FDA has set an action level for inorganic arsenic in infant rice cereal.
How to Reduce Heavy Metal Exposure in Baby Food
Experts recommend mixing up your grains.
Don’t let rice hog the spotlight; bring in oatmeal, barley, quinoa, or multigrain cereals for a little variety, as highlighted in a comprehensive review on infant cereals and whole grains by Gómez et al. (2019) published in Nutrients.
Same goes for veggies.
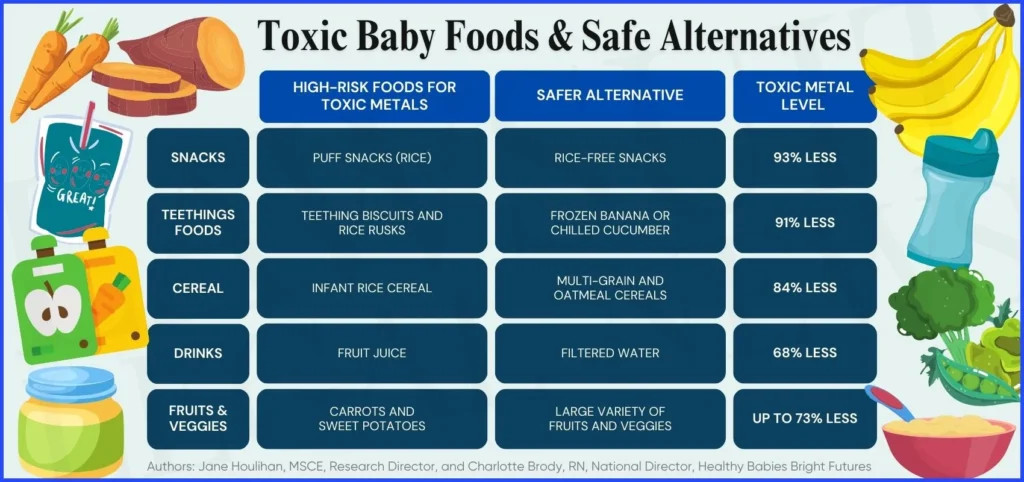
Some roots like carrots and sweet potatoes, and leafy greens like spinach, can pick up more metals than you think. Rotating what you serve helps spread out the risk.
Even a quick rinse and draining rice can make a difference; your colander is doing more than just collecting dust.
Breastfeeding A Safer Option
And hey, while heavy metal testing sounds like something out of a sci-fi movie, pediatricians don’t recommend routine screening for healthy infants.
Instead, stick to a varied diet, limit high-risk foods, and, if you have well water, check it for safety.
Breastfeeding can also help reduce exposure, as breast milk typically has fewer contaminants than formula or water.
How to Prevent Allergies
No need to stress about allergens. Experts now say early introduction is better.
In fact, the AAP and NIAID recommend giving peanut butter thinned with breast milk or formula as early as 4 to 6 months can actually lower allergy risk, especially for babies with eczema.
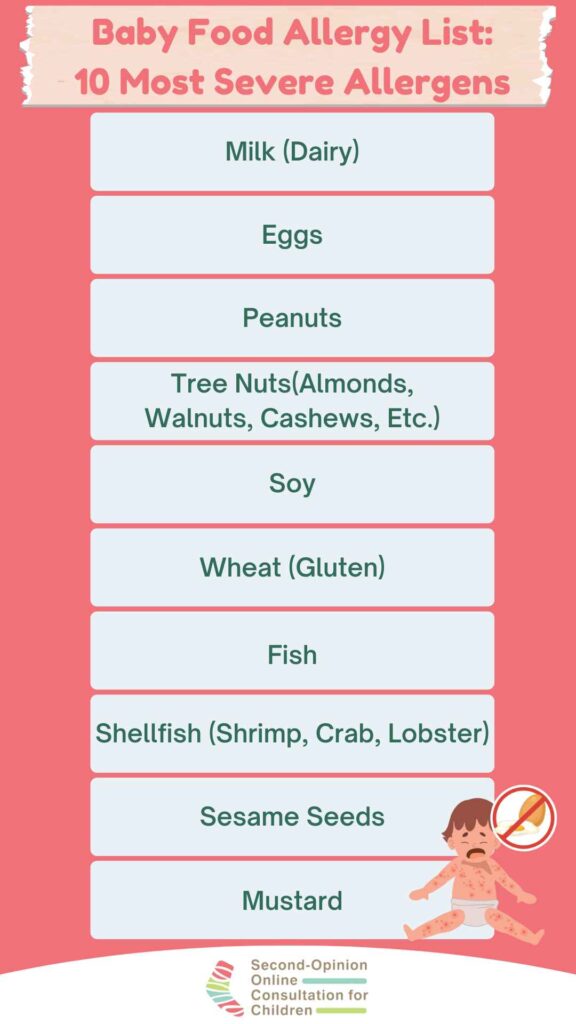
Eggs, yogurt, and cheese?
They can all join the party by around 6 months. Just make sure to introduce new foods one at a time and keep an eye out for reactions.
No need to panic, just pay attention.
Safety First, Food Fight Second!
In the end, top brands are stepping up on safety, so are we, as parents.
Your only job is to wonder if your baby’s going to spit the food on the face (very likely) or eat it with excitement (less likely… but we can dream).
Practical Tips for Parents
Here are some practical tips to make feeding time less stressful and more enjoyable for everyone:
Helping Your Baby Adjust to New Food Textures
Start with smooth purees around 6 months. Then slowly move up the texture ladder by introducing lumps and mash from 7 to 9 months, and soft finger foods by 9 to 12 months.
Think progression, not panic.
Use the trusty fork mashtest. If you can squish it easily between your fingers, it’s baby-ready. If not, back to the cutting board.
Always keep an eye out while they eat. Cut foods into small pieces, and avoid round, hard foods like whole grapes or nuts.
Mixing Familiar and New Tastes for Your Baby
Mix new ingredients with familiar favorites. Stir a new veggie into mashed potatoes or toss some cinnamon into plain apple puree.
And if your baby makes a face?

Don’t worry, it can take 10 tries or more before they’re sold. Keep showing up. Offer a range of flavors, even sour or bitter.
Let your baby join the table with a mild version of what you’re having, like a curry or stew.
It’s messy but fun.
Introducing Allergens the Right Way
Introduce allergens one at a time.
If your baby has eczema or allergies that run in the family, check with your doctor before offering peanuts or other common allergens.
Otherwise, introduce these foods along with other solids.
Keep the texture baby-friendly. Try mashed egg yolk, thin peanut butter with water or breastmilk. Use small flakes of cooked fish.
This is about strategy, not guts.
Homemade vs Store-Bought Baby Food
Homemade baby food can save you money, give your kid more variety and nutrients.
That veggie risotto you make at home costs around 56p per portion. And a pouch from the store, more than double that.
Feature | Homemade Baby Food | Store-Bought Baby Food |
|---|---|---|
Cost | Lower cost per serving | Higher cost per serving |
Ingredient Control | Full control (fresh, no additives) | Limited to what’s available commercially |
Time Required | Time-consuming to prepare & clean up | No prep needed |
Storage | Needs careful storage & labeling | Shelf-stable, often resealable |
Variety | Unlimited, customizable flavors | Limited to available options |
Convenience | Less convenient for travel/on-the-go | Easy to carry, ready to serve |
This isn’t just mum math. Studies back it up.
But making your own food isn’t free. You’ll need a blender, some containers, and time. Probably the one thing you don’t have.
If you’re sticking with pouches, check the price per ounce. Read the label. Make sure you’re getting real food, not lab leftovers.
Organic sounds great. Until you see the bill. Huh?
Save it for berries and leafy greens. Regular ones like bananas and apples don’t need a premium label.
No judgment here. Just choices. What’s yours?
Save Time and Feed Smarter
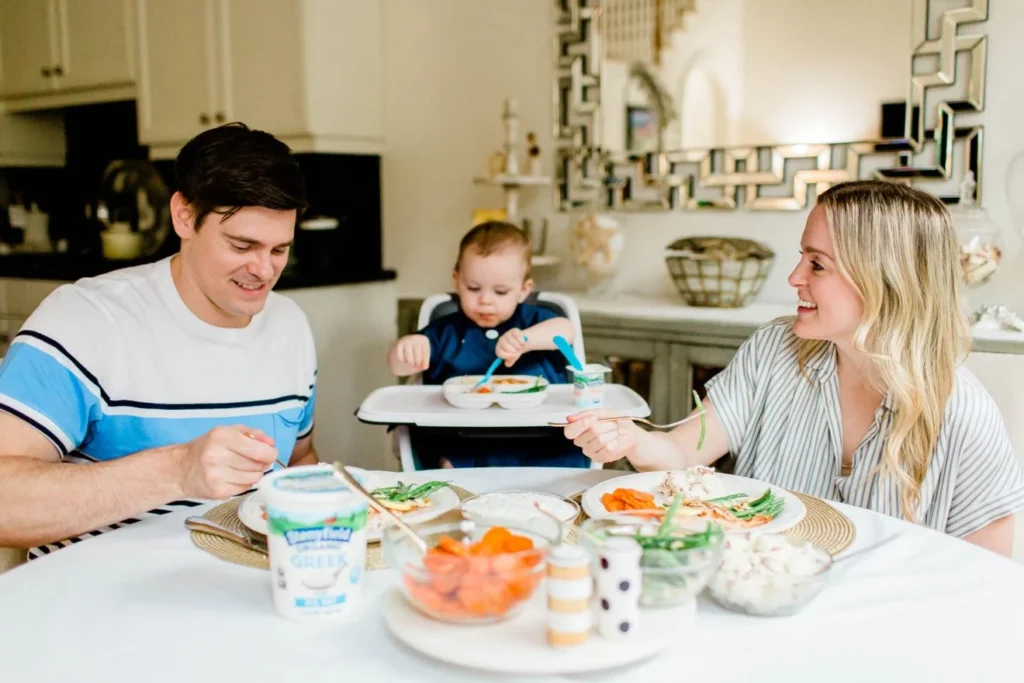
Feed your baby when you eat.
Use parts of your own meal. Mash up some carrots from your plate. Scoop out some avocado from your salad. Done.
It saves you time. It brings them to the table. And no, you don’t need to cook two dinners.
Skip the puffs and sugar bombs. Go with soft fruit or plain yogurt.
They might not cheer for a carrot stick now, but at least you won’t be stuck trading cookies for bites later.
FAQs
What’s the Best Superfood for Babies?
Eggs, beans, nuts, fruits and vegetables.
Eggs are loaded with choline and B12, great for brain health.
Beans deliver iron, zinc, protein, and omega-3s.
Nut butters (smooth, of course) offer healthy fats and nutrients that support memory and learning.
Fruits and vegetables bring in flavor variety and vitamins your baby needs to thrive.
Mix these into your baby’s meals after six months and you’ll be laying a solid foundation.
Can Spicy Flavors Help Babies?
Some studies say tiny traces of spicy compounds in breast milk might help with digestion, increase appetite, or reduce colic. Others say your baby might get fussy. So go easy on the spice and pay attention to how your baby reacts.
Why Are Savory Flavors More Important Than Sweet Ones?
Savory foods like meats, veggies, and legumes add iron, protein, and variety. The sooner they try them, the more likely they’ll keep eating them.
If you let them relying only on sweet foods early, especially processed ones, can shape long-term habits.
What Are the Best Flavor Combos for Introducing Allergens?
Stir a little peanut butter into applesauce. Mix scrambled egg with mashed avocado. Add finely crushed nuts to yogurt. Blend soft tofu into fruit puree. Try wheat cereal thinned with breast milk or formula.
One new allergen at a time. Wait a few days before adding another.
Keep it simple. Use foods your baby already likes.
Conclusion: What’s Next for Your Baby’s Food Routine?
So, what now?
You’ve started solids, picked flavors, followed the experts’ advice, and maybe dodged a few flying carrots. Your baby’s eating habits are forming right now. Every meal matters. You’re doing great.
So keep going.
- Keep offering new tastes, they may hate it first.
- Keep rotating textures, colors, and ingredients.
- Keep sitting together at the table, even when half the food ends up under it.
Food doesn’t need to be perfect. It needs to be real, varied, and shared.
And no, your baby won’t remember that mango-kale smoothie you spent 45 minutes prepping. But their body, brain and taste buds will.
You’re not just feeding them. You’re teaching them how to enjoy food. How to try, to trust, and to explore.
That’s a pretty big deal.
